
Author: Matthew Wendling

  • Army JROTC Competition Color Guard Gear

    Army JROTC Competition Color Guard Gear

    For any competitive JROTC colors team, selecting the right gear for success is a make-or-break decision: no amount of strenuous, calculated practice on the drill pad can make up for an equipment malfunction! As such, we strive to select just the right gear that will allow the cadets to shine in the eyes of their judges. This article will walk you through our decision-making process and offer the practical tips color guards are looking for the country over. But first, a few notes…

    ALWAYS refer to your SOPs and LOIs to ensure that the gear you select falls within the realm of acceptable equipment; a drill meet’s SOP/LOI document nearly always supersedes other documentation as it contains special information pertinent to the competitive environment!

    Remember that your judges are being asked in their judges’ briefs to grade the quality of the drill executed; having the best LOOKING gear is a secondary consideration to having the most FUNCTIONAL gear; we have NEVER seen a competition determined by who wore the most “ceremonial” attire – but we certainly have seen it determined by functionality of equipment many times over!

    So what do we recommend? Keep reading below!

    Poles & Ornaments
    We recommend the TRADITIONAL FIT 8’x1 1/4th” aluminum pole (84_). The length and diameter is perfect for conducting high-speed competitive movements with snap and pop while remaining light enough to manipulate with ease. When acceptable per SOPs, we recommend the Round Spear Styrene flag pole ornament (85_) which is symmetrical (no more struggling to align your spades) and allows for easy uncasing/casing when required. The plastic material is lightweight and won’t affect the balance of your pole or poke through the canvas flag casings!

    Flags
    While 3’x5’ is the standard competitive flag size, we highly encourage you to check your SOP as, when possible, we recommend a 3’x4’ set of flags. We recommend, when allowed, that these flags be unfringed. The smaller size has several advantages: it hangs higher so that visibility is not an issue and the shorter length allows the judges to view the cadets’ bearing while marching. The shorter size ALSO represents several less cranks of the pole during the uncasing and casing procedures! Removing the fringe also shortens the flag while removing an element that can be tricky to contend with while uncasing/casing. While our 3’x4’ US flag (0223) is a standard product, be sure to give us a call to discuss custom-ordering your 3’x4’ state or organizational flag!

    Flag Cases
    The ONLY flag cases we recommend for competition are our exclusive line of Canvas Flag Cases (68_). For classroom or ceremonial use, imprinting on these cases is sharp but when every minor difference means a demerit, we recommend keeping your competition cases blank so that when they are folded and placed in the pistol belts, there is no chance they’ll look different.

    Harnesses
    The potential for demerits for missing the cup with the flag pole far outweighs any other consideration when selecting a harness. While shiny nickel or brass cups look outstanding for honor guard functions, they are impractical and dangerous for competition. We recommend our Double Leather Flag Carrier(1802_). With its wide plastic cup and sharp-looking leather, these are a favorite of competition colorguards at the highest levels!

    Pistol Belts
    The Army Training Circular is very specific about the type of belts to be worn: pistol belts. But within that broad category, there are many options. We recommend opting for a clean, crisp look with minimal metal accents to avoid impossible upkeep on your competition-ready gear! Our line of Military Police Belts (18_) is perfect for competition. Remember, each of your color guard team members needs a belt, not just the flag bearers!

    Rifle Slings
    You have a lot of options when it comes to rifle slings for your competition color guard. Some companies produce nylon slings. You can choose from brass and nickel hardware. But we ONLY recommend using Heavy Web Rifle Slings with a nickel finish (200_N). Unlike the brass finish, the nickel action is smoother for conducting sling arms and is far easier to maintain without buffing or shining. The cotton material is flexible enough to be accommodating of the intricate sling arms maneuvers but rigid enough to snap and pop with ease!

    If you have any questions, please don’t hesitate to reach out! We stand ready to answer any questions you might have concerning the best gear to outfit your teams! Remember, this list is highly specific and curated for the discerning Army color guard team looking to compete successfully at a high level!

    Best of luck and happy drilling!

    Want to learn more? Subscribe to In Step for in-depth JROTC competition product information! And be sure to visit www.drill-dynamics.com for all your drill team training questions and needs!

  • Exhibition Practice Structure

    Exhibition Practice Structure

    The key to a successful practice is to begin with a solid PROCESS. Today, we’ll discuss the process of working through exhibition drill.  No matter what your goal, a basic exhibition drill practice will follow the same basic structure to maximize efficiency!  The process itself is very simple so we will outline it and then break it down piece-by-piece!

    1. Dynamic Physical Warm-Up
    2. Drill Warm-Up
    3. Skill(s) Isolation
    4. Skill(s) in Context
    5. Skill(s) Application
    6. Static Cool-Down

    So let’s take a look at each step!

    Dynamic Physical Warm-Up

    Though it’s common knowledge in most sports/physical activities, a traditional static stretch (i.e. holding a position to stretch a muscle group) is NOT a healthy way to begin a practice.  Not only does this strain your muscles, it also doesn’t adequately prepare your body for the constant motion associated with drill.  So rather than normal stretches, begin by engaging your muscle groups in dynamic warm-ups.  Here is a video resource on this topic showing some examples of dynamic stretches:

    Drill Warm-Up

    The purpose of the drill warm-up is three-fold:

    1. Break Down of Movements
    2. Individual Physical & Mental Warm-Up
    3. Team Synchronization

    To warm up quickly, simply choose one of the basic manuals, spins, or sequences in your routine.  Start by moving count-by-count with a focus on intensity of movement and precision in each count.  Not only are you taking it slowly, you’re building your eye and feel for precision.  Check yourself at each position to make sure it is correct.  Then, move through the manual, spin, or sequence at a slow cadence focusing on that same count-by-count precision.  Next, move through the manual, spin, or sequence at a normal cadence focusing on synchronization with your teammates.

    At this point, it’s important to give your team a short span of time (30-45 seconds) of time to warm up individually.  This part of the warm-up should be whatever is required of the individual to get comfortable and loose.  This could mean working through additional sequences, additional dynamic stretching, or even quiet visualization.  This part of the process is as much about the mental as the physical and is designed to focus the individual on their drill.

    Lastly, work through the manuals, spins, or sequences again focusing on precision of timing from team member to team member. Here, you should make sure each cadet is approaching the motion in the same manner.  For example, if cadets are clapping the rifles with the right hand at Port Arms, ensuring that each cadet is fully extending his or her arm will assist in the timing of the movement.

    All the concepts from the warm-up will translate into the practice of actual sequences in your routine!

    Skill(s) Isolation

    In this portion of practice, you’ll identify an individual sequence in your routine that might need some work.  In a process similar to warm-up, work together to ensure that the timing and technique of each cadet is uniform count-by-count in the sequence.  If there are more difficult skills in the sequence, take time to break them down and assist all in understanding the proper technique and execution of those movements.

    This portion of practice should involve multiple repetitions of the sequence in question with feedback – both positive and negative – being provided with each rep.

    Skill(s) in Context

    Every exhibition drill sequence is set up from the sequence immediately before it and has a direct impact on the sequence directly after it.  Make sure that you aren’t only focusing on the sequence itself but also transitioning INTO and OUT of that sequence for smooth flow in the routine.  This helps your team understand how the sequence itself will feel compared to the sequences before and after it.  Multiple repetitions of this larger chunk of drill with feedback throughout will make this portion of practice highly productive.

    Skill(s) Application

    A full run-through.  This is where many teams START practice but a good full run-through can be much more.  After working the sequence(s) in isolation and putting them in context with the sequences before and after, the culminating step is making sure that work “sticks” in a full routine run-through.  In this run-through, bearing is KEY.  Treat this run-through like a competition with no breaks in bearing, no corrections from within the formation, etc.  The instructor/coach/cadet commander should observe the team performing to the best of their ability and provide feedback on what “stuck” from practice and what might still need additional work in the future.  Most importantly, you’re looking for evidence that the team is applying the work done in the previous steps.  Do you see them isolating and snapping the counts you worked on earlier?  If so, great!  You made progress.  If not, perhaps more time is needed next practice!  These run-throughs are all about applying the hard work of each practice!

    Static Cool-Down 

    While static stretching is not encouraged BEFORE practice, it can be used after a practice to cool down from the extreme engagement of exhibition drill.  Make sure not just to fall out and dismiss practice; cool down and keep the muscles fresh for your next practice!


    Want to see this process in action?  Drill-Team Dynamics Inc. will once again be hosting multiple summer training opportunities around the country!  CLICK HERE to learn more!  And if you’re looking for a one-on-one experience for your team with a trained Coach, be sure to CLICK HERE to contact us today!

  • How Do We Staff a Training Workshop?

    How Do We Staff a Training Workshop?

    At Drill-Team Dynamics Inc., we are very selective about choosing trainers to fit the needs of your unit. Our goal is to match you with the best fit from our wide range of trainers, all of whom are highly skilled and talented in their own right. We go to great lengths to ensure that the individuals who come to your school are consummate professionals on the drill deck and off.  While there are many who excel at teaching (and even more who excel at drill), we are blessed to maintain a group of associates who truly represent the best the drill community has offer.  Here are some of the factors we utilize in choosing how to best staff a training function for maximum effect!  The bottom line is this: we will never compromise the quality or safety of your training and we will always make a recommendation that puts your needs first.

    Safety

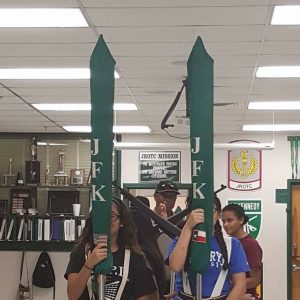
    paloma-valley-njrotc-instructionThe well-being of your cadets is at the forefront of all our decisions.  Our rule-of-thumb is very simple: We will not allow a training mission to progress if the ratio of cadets to trainers exceeds 16:1.  In other words, we strive to ensure that each platoon/flight formation is represented by a Drill-Team Dynamics Inc. trainer.  This means that a school requesting training for 40 cadets will be staffed with 3 trainers.  Depending upon the specific types of training requested, we may also recommend additional trainers.  A school with a large number of cadets inexperienced in armed exhibition drill has different safety requirements than a team highly-experienced in armed exhibition drill.  Our goal is to keep eyes on your cadets 100% of the time during a training mission.   With very rare exceptions (mostly for individual color guard units), all training missions will be staffed with a minimum of 2 trainers.
    Effective Instruction

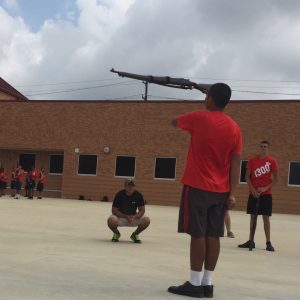
    IMG_7278Our mission is to deliver highly effective instruction – meaning that no cadet is left out.  As we get to know you and your program, we ask many questions designed to help us better understand where your cadets are and how we can best meet them where they stand today.  If a school is particularly keen on in-depth color guard training, we will do our best to assign a specific trainer to your color guard teams.  If multiple schools decide to join together for training, we will take this into consideration and staff accordingly.  As talented as our trainers are, we will never compromise instructional quality to the individual cadet by under-staffing a training mission.  We know that 1 trainer might have a positive impact on both an unarmed and armed drill team.  However, we know that 2+ trainers will more than double the effectiveness of the teaching.
    Background & ExperienceFullSizeRender 3

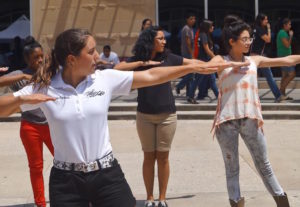
    We make every attempt to pair each group we service with trainers who match their ability, experience, service affiliation, and style.  Though we require all our trainers to be proficient and knowledgable across all major service manuals, each individual brings their own background and experience to the table.  We do our best to ensure there is a duty expert in the service manual of the unit at each function.  Additionally, we have experts such as Edford Luckey, MSG, USA (Ret.) who specialize in specific areas of competitive drill (in this case, Army color guard).  We take this into account as we select the best trainers to meet your needs.  This is especially true when it comes to exhibition drill.  We have individuals who excel at teaching brand new beginning drillers and trainers who have an eye for bringing out the best in an already-skilled group.  Whether you’re training for a specific event or just getting started, we have trainers with the skill sets to match.

    Geographic Location901150_284871398320374_269282149_o

    As former instructors and educators, we understand the financial aspect associated with running a quality JROTC program and conducting a professional function such as a Drill-Team Dynamics Inc. workshop.  As such, one of our considerations is most definitely geographic proximity to your unit.  In many cases, units located within driving distance of our trainers benefit from reduced travel costs.  While the perfect trainer for your program may be across the country, we do take travel arrangements into consideration because we’re sensitive to the costs involved with cross-country air travel.  If we can leverage geography to your advantage, we will most certainly do so, however, this is a tertiary factor in our decision-making process.

    If you’d like to learn more about how to bring Drill-Team Dynamics Inc. to your unit, please CLICK HERE to begin the process!

  • So you want to be a drill team coach?

    So you want to be a drill team coach?

    Upon graduating from high school, many people realize that their passion for drill is still as great as it ever was. And what better way to stay involved with the activity you enjoy than by returning to help “coach” your high school drill team? If this describes you, these are our TOP 5 DOs & DON’Ts for the aspiring civilian drill team coach.

    DO:

    1. DO understand the responsibility.

    As an aspiring coach to high school-aged cadets, you may be forced to grow up much faster than your peers. You will be (or should be) establishing yourself as an adult figure upon whom your team can depend. This means that your sense of sacrifice will be tested. Remember, many of the cadets on your team will have experiences with adults in their lives failing to follow through. So if you commit to attending 3 practices a week, you must make sure you honor your commitment. Students today do not need another adult letting them down. And as a coach, you have tremendous power in supporting those in your charge. Do not abuse it. Do not take it for granted. And understand that in doing so, you will be forced to make choices about mature decisions that your peers don’t necessarily have to make.

    2. DO give yourself time.

    As excited as you are to get back in the drill game, we do recommend that you take some time to pursue other interests. This will help you establish whether your passion for drill is a hold-over from your high school days or truly something you want to dedicate your time towards. It could be as simple as taking the summer off to enjoy other things. You’ll want to give yourself some space because returning to coach a team is a big commitment and your role won’t be the same as it was during your days as a commander or cadet. Give yourself time to figure out whether you’re holding onto your leadership position or if you have a genuine passion for helping others through drill.  You will find that physical drill instruction might be 40% of the job at best and that exhibition drill instruction might be 10%.  This is your time to figure out what you really like about drill!

    3. DO seek out opportunities elsewhere.

    Returning to coach the team you just graduated from is tough. There are boundaries (which we will discuss later on), attitudes, and other factors that can making your involvement less than successful. Rather than returning to your alma mater, we recommend seeking out opportunities with other groups. It can be as simple as asking your instructors for recommendations or attending a local competition to introduce yourself to other programs. When do you so, be sure to dress nicely and be professional. Remember, in the eyes of these instructors, you are only a recent graduate. You need to LOOK the part and SPEAK the part in addition to knowing your stuff when it comes to drill team!

    4. DO understand the costs.

    Drill coaching is largely volunteer. With few exceptions, coaches are compensated for their countless hours of hard work and dedication with the satisfaction of a job well done. And if you’re lucky, you might receive some compensation for food or travel expenses – but don’t necessarily count on it. Additionally, you WILL end up spending a great deal out of pocket. One of your cadets needs lunch money? You’ll be there to help them. Rifles need new slings? You might just find yourself digging into your wallet to make the mission happen. Drill coaching is NOT something anyone does to make a living and it is NOT a substitute for a steadily paying job. You must have the passion for helping cadets succeed because, at the end of the day, your most tangible reward will be the memories, smiles, and knowledge that you made a difference.

    5. DO seek out resources.

    Being the go-to person for drill knowledge is harder than it looks. And relying on “what you did in high school” isn’t a formula for success, especially if you’ve transitioned to a new program. Make sure you read up on all the service drill manuals. Find opportunities to network with other coaches. Attend seminars. The more you know, the more confident you will be in your ability to instruct. The better instruction you give, the better your team will be!

    Which brings us to our list of DON’Ts:

    1. DO NOT date your cadets.

    You can turn on the news any given day and hear a story about a teacher or coach who did something they ought not have been doing as it concerns a student in their charge. As a coach, you should NEVER be alone with a single cadet, especially not one of the opposite gender. You shouldn’t be the one offering them rides home. You should not visit their homes. You should not have them over at yours. You will naturally grow close with those you instruct but always remember, your coaching work is NOT a dating service. The moment you agree to step into that role, that group of human beings is OFF-LIMITS. There are millions of people in the world and now, the pool of people you’re eligible to think about romantically has been reduced by the size of your team. Under NO CIRCUMSTANCES should you initiate or entertain any romantic interaction with your cadets. Should you be approached, you need to immediately establish your boundaries as a professional and speak directly with the program’s instructors. We cannot stress this enough.

    2. DO NOT fraternize.

    The cadets in your charge, whether you spend 3 years in school with them or not, are NO LONGER YOUR FRIENDS. You don’t attend their cadet-only gatherings, you don’t text them informally. From the moment you decide to be a coach, you begin walking a razor thin line between developing a positive relationship and maintaining professional distance. This is ESPECIALLY hard for recent graduates. In the course of a single summer, you will need to establish yourself not as a friend but as a coach. This is why we recommend coaching a program from which you did not graduate or, at the very least, waiting some time before returning to coach.

    3. DO NOT forget that it isn’t about you.

    Coaching can be extremely satisfying. The knowledge of a job well-done is a great feeling! But never forget that at the end of the day, the cadets on the drill deck are the ones earning the accolades. It’s easy to let their success go to your head but remember that your job is to support the team. The best coaches will tell you they feel glowing pride in victory and crushing defeat in loss. This causes them to work hard towards ensuring that their cadets receive the very best of them each practice. Keep a broad perspective and remember that everything you do is about the CADETS. Ask yourself with each decision: Is this good for ME or is this good for the TEAM? It sounds easy in theory but in practice, it WILL test your perseverance and sense of sacrifice.

    4. DO NOT overstep your bounds.

    At the end of the day, no matter how much you know, how much experience you have, or how good you are at what you do, the instructors of the JROTC program reign supreme. They are allowing you the opportunity to take the wheel and steer but never forget that the bus belongs to them at the end of the day. You may not agree with every decision they make. You will, however, need to learn to accept that your role is and will always be limited. You are a civilian assistant to the retired NCO(s) and officer running their JROTC program. At times, tempers might flare and disagreements may arise. That’s normal. But always remember that you’re there to help crew the ship, not chart its direction.

    5. DO NOT lose your passion.

    The world of drill team coaching, at its deepest core, is one of long days, much stress, and incremental gains. At times, you may be frustrated with your team. You may be working a full time job, attending practice, and attempting to balance the rest of your adult responsibilities. But at the end of the day, if you commit to coaching, it can be one of the most rewarding endeavors you could ever undertake. When it starts getting stressful and you begin asking yourself whether doing all this work for so little appreciation (or compensation) is really worth it, remember that you ARE making a difference in someone’s life. What you’ll begin to realize is that if you love drill, you won’t last very long. But if you love serving others and assisting them towards their goals, coaching is one of the best ways to pursue your passion!

  • VIDEO: Unarmed Exhibition Memorization

    VIDEO: Unarmed Exhibition Memorization

    Today, we talk UNARMED EX training! How do you remember your sequences? How do you teach them more effectively? Kirsten Pacheco explains the best way to accomplish the mission!

    Would you like to learn directly from our Coaches? Be sure to check out our on-site training services (or pass along the information to your instructor!) As always, if you have any questions, leave them as comments below and we’ll be glad to help out! Don’t forget to follow us on Instagram (@drillteamdynamics) and like us on Facebook (http://www.facebook.com/drilldynamics)!

  • VIDEO: Port Arms in Exhibition Drill

    VIDEO: Port Arms in Exhibition Drill

    DTD Coach Matt Wendling explains the ideal standard for Port Arms during exhibition drill and WHY we feel this will benefit your team so much! The mechanics of Port Arms change drastically when you introduce exhibition movements such as manuals and spins. You want your team to have the best chance at cleaning and making precise this key position through which nearly all exhibition drill is conducted. In this video, we’ll demonstrate how and why we choose the specific mechanics that we recommend to each school.

    Would you like to learn directly from our Coaches? Be sure to check out our on-site training services (or pass along the information to your instructor!) As always, if you have any questions, leave them as comments below and we’ll be glad to help out! Don’t forget to follow us on Instagram (@drillteamdynamics) and like us on Facebook (http://www.facebook.com/drilldynamics)!

  • VIDEO: Selecting Your Color Guard Team

    VIDEO: Selecting Your Color Guard Team

    MSG Edford Luckey spent a large portion of his career as a Junior ROTC instructor developing cadets into young professionals, capable of presenting the colors in any scenario. His teams were consistently sought after for professional sporting events, naturalization ceremonies, and other high-visibility functions. Furthermore, MSG Luckey is perhaps the most dominant color guard coach in the history of competitive drill with a staggering number of national championship accolades and thousands of life-changing experiences for his cadets. In this video, MSG Luckey explains, in his unique and energetic style, the thought-process behind selecting a color guard team for its appearance, chemistry, and continuity!

    Would you like to learn directly from our Coaches? Be sure to check out our on-site training services (or pass along the information to your instructor!) As always, if you have any questions, leave them as comments below and we’ll be glad to help out! Don’t forget to follow us on Instagram (@drillteamdynamics) and like us on Facebook (http://www.facebook.com/drilldynamics)!

  • VIDEO: Unarmed Exhibition – Types of Stomps

    VIDEO: Unarmed Exhibition – Types of Stomps

    DTD Coach Kirsten Pacheco gives insight on the different kinds of stomps utilized in unarmed exhibition drill. More importantly, she explains why it’s crucial that teams differentiate and define these different types of stomps in their routines. Making sure that each team member understands and knows how to execute these different stomps will not only make creating your routine that much easier to do quickly, it will also ensure that you have a fighting chance of cleaning each movement.

    Would you like to learn directly from our Coaches? Be sure to check out our on-site training services (or pass along the information to your instructor!) As always, if you have any questions, leave them as comments below and we’ll be glad to help out! Don’t forget to follow us on Instagram (@drillteamdynamics) and like us on Facebook (http://www.facebook.com/drilldynamics)!

  • 5 Ways to Set Your Team Up for ARMED Exhibition Success

    5 Ways to Set Your Team Up for ARMED Exhibition Success

    Designing an exhibition routine is a tall order for many schools. Training to execute that routine, whether armed or unarmed, is another feat in and of itself. This week, we’ll focus on ARMED exhibition and the processes you can implement to help set the team up for success.

    1. Master Regulation Drill

    Before you begin working on exhibition drill, you should have a firm grasp of regulation drill concepts.  This doesn’t simply mean knowing how to execute all your basic standing, marching, and rifle manual movements.  It means that each member of the team should have a confident command of these movements before even attempting basic exhibition drill.  While exhibition drill may be the “flash” of the team, good regulation teaches the fundamental mechanics required for good exhibition: handling of the rifle, body control, and proper form.  Don’t fall into the trap of blowing past your regulation drill training in an attempt to get to exhibition!  Even the coolest of tricks falls short when it becomes clear that a driller hasn’t mastered basic control over their body – a skill honed in sharp, powerful regulation drill.

    2. Safety First!

    Your collective ability – not the ability of any individual driller – should dictate the types of movements you’re attempting to learn.  Our expectation is simple: no cadet will work on or perform a spin or movement not being actively utilized in the routine during practice time.  Returning, experienced drillers are far more likely to be accident-prone due to their wanting to branch out and practice more advanced tricks.  Focus the energy and drive of your experienced drillers on teaching the new members or on honing routine-specific skills.  Team practice time is not the time for individual progression or for advanced solo maneuvers.  Progress as a team and within the capabilities of the least-skilled or experienced drillers.  Always put safety before anything else in the training of exhibition drill!

    3. Don’t Leap Into Spinning

    While spinning and tossing the rifle continuously might seem to be the aim of exhibition drill, the fact of the matter is that most successful exhibition routines contain very little spinning relative to the other sorts of movements utilized in the routine.  When we travel to schools and begin teaching exhibition drill, we teach units to develop first a set of standards for exhibition drill.  This means learning a version of Port Arms (we recommend a vertical Port position) for exhibition drill, as well as a version of Right Shoulder, Left Shoulder, etc. These standards will form the core of how you move from position to position in your drill.  Train the snap, pop, and precision just as you would in regulation drill.

    4. Develop A Base of Manuals & Movements

    Rather than leaping into developing a routine, first teach your team the components from which the routine will be created.  When we teach exhibition, we teach that 3-count, 4-count, 5-count, and 6-count boxes are the basis around which most sequences can be created.  You can see an example of this movement style here:

    Using these movements as the core of your routine makes teaching and creating sequences very easy.  Just specify which movements will be used to create the sequence and your team should know how to execute them because of their previous training!

    5. Teach to the Body, Not the Rifle

    As you continue to teach and train your new members, remember back to when you first started drilling.  Don’t forget that the rifle is a new implement to these cadets.  As you teach, focus on what the body should be doing at any given movement.  This may take some introspection on your part as the trainer.  Learn to recognize what actions with the body cause what reactions with the rifle.  This way, you can more quickly and safety identify corrections!  Handing a new cadet a rifle and simply telling them to, “Figure it out” as we’ve heard countless times around the country may result in their learning the movement but it will take far longer than taking time to explain the mechanics of the movement.  Check out this video that explains one way to break down the mechanics of basic rifle handling in a way that doesn’t reference the rifle but instead focuses on how the body should move:

    Drill-Team Dynamics Inc. wants to help you succeed. Connect with us via social media on Instagram (@drillteamdynamics) and Facebook (Facebook.com/DrillDynamics) and leave any questions you might have below.

    Be sure to check out our training services to learn more about how we can help your team take the next step towards success!

  • VIDEO: Why Taking “Breaks” is Bad

    VIDEO: Why Taking “Breaks” is Bad

    Drill-Team Dynamics Inc. Executive Director 1stSgt Christopher Borghese explains why the “Take 5!” mentality at practice is ultimately more costly than you might realize.  Time is of the essence at any drill practice and the team that makes good use of it will be the team that is successful!

    https://www.youtube.com/watch?v=LwNBmoVoNTs

    Drill-Team Dynamics Inc. wants to help you succeed. Connect with us via social media on Instagram (@drillteamdynamics) and Facebook (Facebook.com/DrillDynamics) and leave any questions you might have below.

    Be sure to check out our training services to learn more about how we can help your team take the next step towards success!